-
Using the Select Objects
tool
 ,
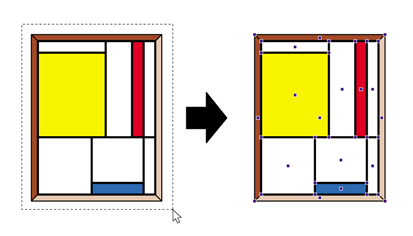
select the object which you want to shear. Click the object or drag a rectangle,
called a marquee, around the object.
,
select the object which you want to shear. Click the object or drag a rectangle,
called a marquee, around the object.
Example: Dragging a dotted rectangle around the object to select the entire graphic.
-
Click the Shear Selection tool
 .
.
The object’s point of origin from which it will be sheared is indicated.
The point of origin is in the center of the selected object.
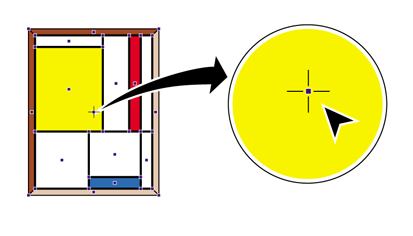
The Enfocus Inspector changes accordingly.
-
If necessary, change the Constraint Angle (for
SHIFT-shear) or
the Cross Hair Color
in the Numeric
feedback area of the Enfocus Inspector.
Note: In the Numeric Feedback area you can find exact information about the shearing action you are about to perform.
-
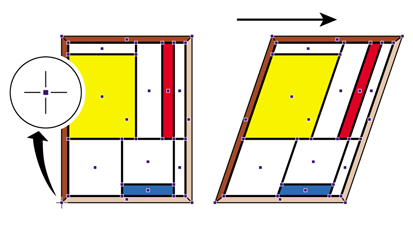
Do one of the following:
- To shear the object while keeping the center point as the point of origin, drag the object into a random direction.
- To move the point of origin, double-click on another position inside or outside the object. Then drag to shear the object using the object’s new point of origin. For example, to create a parallelogram from a rectangular object, place the point of origin on any of the corners of the object.
Example: Placing the point of origin on the corners of an object to create a parallelogram from a rectangular object.
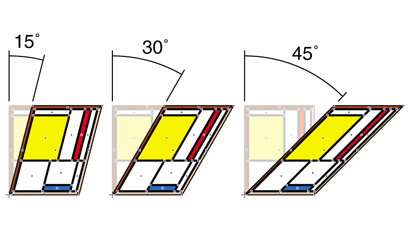
- Hold down the SHIFT key while dragging to limit the shear movement to a fixed angle of constraint, for example 15°. You can set this angle in the Numeric Feedback category of the Enfocus Inspector.
Example: Shearing an object in fixed angles, as defined in the Preferences.
- Hold down the ALT key (Windows) or Option key (Macintosh) while dragging to shear a copy of the selected object.