Bleed, registration marks and other print and color control strips are usually displayed outside the final trim size of a PDF document. This information is defined in the application that was used to create the original PDF file, for example, Adobe InDesign or Quark XPress.
Once they are made visible, these elements can be edited, added, or removed, just like any other graphic object.
-
Click the View Page Boxes
 button.
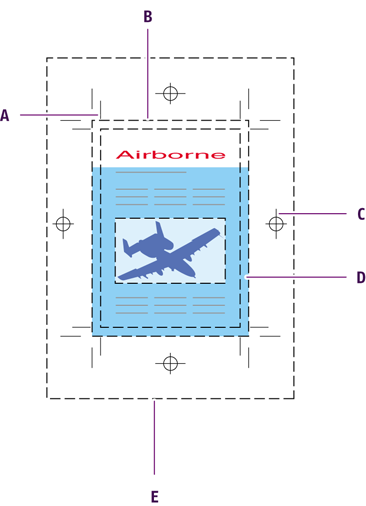
Acrobat displays the page on the complete media size and shows:
- The trim size
- The page’s trim marks, if any
- The page’s registration and printer marks, if any
- The page’s bleed, if any Note: Remember that PitStop Pro provides two standard Action Lists to automatically add bleed to your PDF files:
- Generate Bleed to 3 mm if none, and correctly set all Page Boxes
- Generate Bleed to 3 mm if some, none, or not enough
- Color control strips, if anyNote: If the document is generated without any bleed, registration marks or other print and color strips, the page will appear the same (except for a thin trim line drawn at the edges of the image).
-
Trim marks
-
Trim size
-
Registration marks
-
Bleed
-
Media box
You can manually move and edit the page boxes in your document, using the Edit Page Boxes tool .
.