With your variables defined, applying them to your preflight profiles is simple. This section will describe how you can apply variables most checks within a Preflight profile.
Applying a variable to a preflight check
Edit your Preflight profile and select a check that will use a Smart Preflight variable. From the Actions menu for that check, click on it and select Enable Variable Names.Text boxes and check boxes that can have a variable applied will now show the variable button next to it.
To apply the variable check, click the variable button next to the preflight check. The Select a Variable dialog box will be displayed.
First, ensure you are working with the correct Variable Set, if necessary you should select and load the one you want to use.
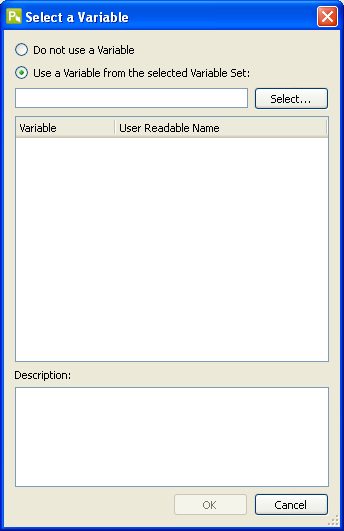
This dialog will display all variables available for that type (i.e. Number, Length, String, or Boolean) of check. If the variable you need does not display, it's either entered in a different Variable Set, or it's not defined as the same "type" as the check you're applying it to.
To apply the variable, select it from the list and click the OK button. The name of the variable will display in the entry box or next to the checkbox it's applied.
Running Variable Checks
Once you have your variable sets defined and applied to your preflight profiles (or Action Lists) you can easily apply it to a PitStop Server workflow.To start, you'll define a new Hot Folder set-up or edit an existing one. Once all the settings for the base set-up is complete, you'll click on the Smart Preflight option in the PitStop Server Hot Folder Editor.
Under Smart Preflight, you'll start by selecting the Variable Set to be used with the Preflight Profile and Action list in this Hot Folder set up. It's very important that the correct one is selected as the workflow will not activate if the Variable Set does not match what's been used in the profiles.
Job ticket file matching
Next, you need to turn on Use Job Ticket and define the file name pattern for the associated job ticket. For the file name pattern there are two variables that can be inserted - one to duplicate the source PDF file name and one for the file extension.
The Time out function will tell PitStop Server how long to wait before rejecting any orphaned documents or job tickets. You then have choices for where orphaned files are moved. The default location is the root directory of your PitStop Server Hot Folder set up for that workflow.
Transfer Job Tickets will allow you to define where processed job tickets are sent after processing.