The GUI visible to the user when the Data Collecting Wizard is
invoked from a standalone tool is slightly smaller than the GUI which is visible when invoked
from the Designer UI. This is because of the unavailability of certain features when invoked
from a standalone tool.
Wizard in Designer
In the Designer UI, navigate to to invoke the wizard. The Welcome dialog box of the Data Collecting Wizard appears. Follow the steps given below to select the data and zip it:
- Click Next button in the Welcome dialog box.
- Select checkboxes to include the corresponding data items in the zip package. All
items are selected by default, some items are disabled so users cannot uncheck them.
They are present in the UI to enable users to view what data is being sent to Enfocus
support team. When users are not able to upload files because of size, they can uncheck
some of the data items and try again to upload.
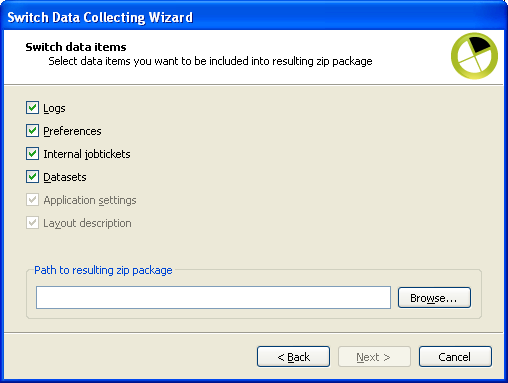
The options available are:- ‘Logs' – Server logs in .db3 file (entire folder "<app_data_root>\logs"). This checkbox is enabled so users can deselect it if required.
- ‘Preferences' – Switch preferences XML (entire folder "<app_data_root>\settings"). This checkbox is disabled by default.
- ‘Internal jobtickets' – All *.ijt files (entire folder "<app_data_root>\tickets"). This checkbox is disabled by default.
- ‘Datasets' – jobs datasets (entire folder "<app_data_root>\datasets"). This checkbox is enabled so users can deselect it if required.
- ‘Application settings' – Switch settings extracted from registry (on Windows) or plist files (on Mac). The extracted data is put into ‘ApplicationSettings.txt' file. On Mac actual plist files are also included into zip. This checkbox is disabled by default.
- ‘Layout description' – the description of Switch installation files. It is put into file ‘Report.txt'. It includes listing of all files and folders with their attributes (size, modification date, permissions etc) from Switch installation folder. This checkbox is disabled by default.
- Click Browse button to select the path where the resulting zip package should be stored and click Next button.
- If the wizard was launched from the Designer UI, a file named "AboutDialog.txt is
created which contains information extracted from About dialog
box in Designer (Support info tab and
Licensing tab).Note: The "AboutDialog.txt file cannot be generated when the wizard is launched from a standalone executable.
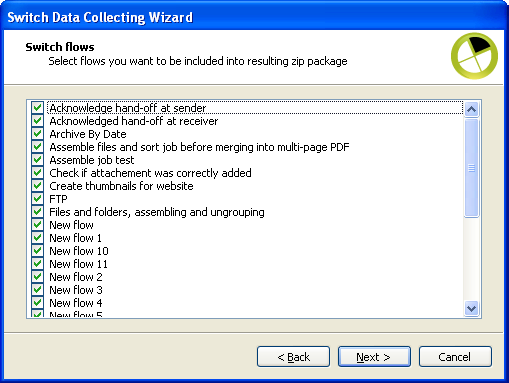
- The next dialog box enables users to select flows to be included in the zip package.
If the wizard was launched from the Designer UI, all the flows present in the Flows pane
are listed in alphabetical order. All the flows are selected by default, users can
uncheck the ones they do not want to include in the zip package. However, no advanced
features (like grouping, sorting, flags etc) are supported.
If the wizard is launched from a standalone executable only one option, Export All Flows is provided.
Users can choose to either export all flows or none. Select and click Next button.
Note: Flows are not exported as "sflows" files but as raw data, that is the following folders are placed as is in the zip package:"<app_data_root>\flows" and "<app_data_root>\PropertySets"
Note: It is recommended that Switch is not processing when data is being collected. Therefore at startup, the standalone wizard verifies if Switch is running or not. When the wizard is launched from the designer and starts collecting data, it deactivates all active flows. The data is collected after all the flows are stopped. The flows are reactivated after completion of data collecting. - View summary of all the options selected so far and click
Commit button. Data collecting process starts . The progress is
represented by a progress bar and a status text above the progress bar. Users can click
the Abort button to terminate the collecting
process.Note: Aborting can be performed only between steps, for example: between flows export and logs export. The Wizard waits until the previous step is finished and only then aborts the whole collecting process. Therefore after clicking Abort users have to wait for some time before aborting commences.
- After successful completion of the collecting process, the dialog box displays the following message Data collecting has finished and the path where the resulting zip package is stored is displayed.
- If any errors or warnings are present, it will also be displayed in the same window.
- When the wizard is launched from a standalone executable and the Switch application is
running, an error is displayed in the dialog box as shown
below:
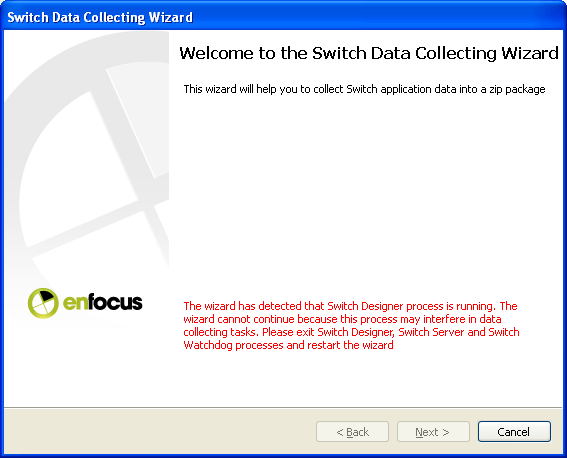
The Next button is disabled. Exit the Switch application and relaunch the wizard from the standalone executable and proceed as explained earlier.