It depends on your user permissions (set in the Users pane in Switch) which jobs you can see and/or further process.
| Button | Meaning |
|---|---|
 |
Click this button to manage the filters that allow you to only display a
subset of the jobs that you have access to. When you click this button, the navigation area expands automatically, so you can see the pre-configured filters (My jobs, Alert jobs, Active jobs, Completed jobs) and the ones you have created yourself (see screenshot below). |
 |
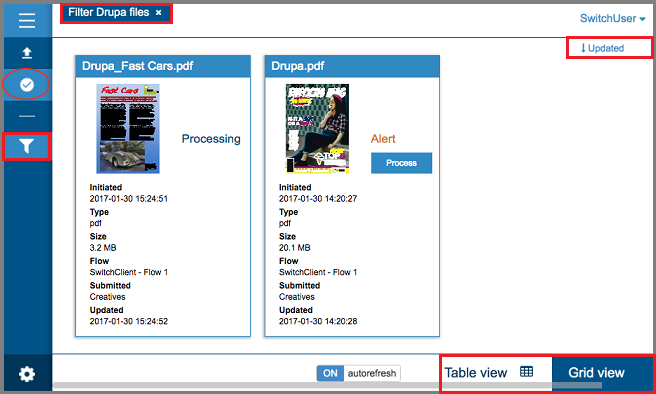
The label in the upper part of the overview refers to the custom
filter that is currently applied. If you want to stop filtering based upon that
filter, you can click the cross icon. Note that pre-configured filters are not marked by a label when they are applied. You can see that they are applied, when they are highlighted in the navigation area. |
 |
This button allows you to change the sort order of the jobs in the overview. In this example, the jobs are sorted in descending order (arrow down) by the date they were last updated (= value of the field "Updated"). |
  |
This button allows you to Switch between table view and grid view (as on the
screenshot):
|
Filters
This is an example of how the navigation area looks when expanded.The filter that is applied ("Filter Drupa files" in this example) is highlighted. 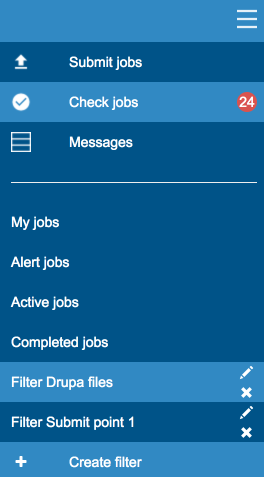
Note the counter next
to 'Check jobs'. It indicates the number of "alert" jobs waiting to be
processed.