If you want to use Switch with an ODBC data source (and you have licensed the Database module), you must set up a connection to the preferred database.
Note: If you have more than one database, you can configure different database
connections as required.
To configure an ODBC database connection
- In Switch, navigate to .
-
Do one of the following:
- Select the ODBC data source information field and
click
 .
. - Double-click the ODBC data source information field.
- Select the ODBC data source information field and
click
-
To add and configure an ODBC data source, click
 .
The ODBC sources field now contains one data source, temporarily called
Data Source. You can rename it in the next step of this
procedure.
.
The ODBC sources field now contains one data source, temporarily called
Data Source. You can rename it in the next step of this
procedure.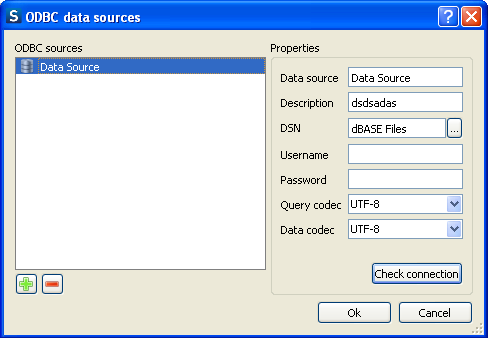
- In the Properties pane, in the Data Source text field, provide a name for the data source.
- In the Description text field, provide a small definition for the data source.
-
To select the DSN (Database Source Name) from the library, click .
The DSN must be defined in the DSN settings of your operating system. For more
information, refer to About ODBC data sources in Switch.
- Provide a Username and Password. These two fields can also be left blank if username and password are not required, or if they have already been defined for the DSN.
- From the drop-down menus, select the appropriate Query codec and Data codec, if required.
-
To test the database connection, click Check
connection.
If the connection succeeded, a message box appears displaying the
message Connection successful.Note: In case of problems, you will see an error message generated by the ODBC tool of your operating system.
- To close the message, click OK. If you have more than one database, repeat step 3 to 10 and add as many data sources as you have databases.
- To close the ODBC data sources dialog, click OK once more.