Once in the Enfocus Variable Set Editor, you can name your Variable Set.
In the section, enter a name for the Variable Set in the Name textbox.
You can optionally enter a brief description about the Variable Set in the Description multi-line textbox.
You can set a layer of security to your Variable Sets by locking them using a password to disable editing. In the Permissions dropdown menu, select the Locked option to set a password to protect your variable set. The Change Password... dialog box appears. Enter a password in the Password textbox. Enter the same password in the Confirm password textbox and click OK button. Click Save button in the Enfocus Variable Set Editor.
A locked Variable Set can be used anywhere like a normal Variable Set. By locking a Variable Set you are only preventing other users from editing the Variable Set and viewing complete details when they open it in the Enfocus Variable Set Editor.
Whenever you open such locked variable sets, you'll have to enable editing by providing the specific password to remove the lock.
You also have an option to change your password at any point of time. Click the Change Password... button, enter a new password in the dialog box which appears and click OK button and Save button in the Enfocus Variable Set Editor.
Whenever you wish to remove the lock from a Variable Set, open the Variable Set, click this
 icon in
the Enfocus Variable Set Editor to open the Enter
Password... dialog box. Enter the password to unlock it and enable editing. Now,
select the Not Locked option in the Permissions
dropdown menu and click Save button in the Enfocus Variable Set
Editor.
icon in
the Enfocus Variable Set Editor to open the Enter
Password... dialog box. Enter the password to unlock it and enable editing. Now,
select the Not Locked option in the Permissions
dropdown menu and click Save button in the Enfocus Variable Set
Editor.
When you try to export a Variable Set which is not locked, the following dialog box appears warning that the Variable Set is not protected with a password.
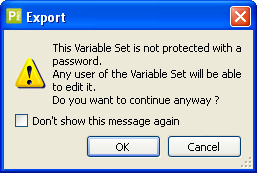
If you want to export the Variable Set without locking it, click OK button. If you do not want to see this warning again select the Don't show this message again check box before you click the OK button.
To add a new variable to a new or existing list, click the  button in
the lower left of the dialog box. Click the
button in
the lower left of the dialog box. Click the  button to remove a variable from the list and click
the
button to remove a variable from the list and click
the  button
to duplicate a selected variable.
button
to duplicate a selected variable.
Click this  button to test or verify current variables.
Creating a Smart Preflight Variable
After you create a new variable by clicking the + button, you can name it by typing a name in the Name textbox.As described earlier in this chapter, there are two different types of variables that can be created - "Constant" and "Rule Based". Each type of variable needs to have a variable "Type" defined. It is important that the variable type matches the preflight check setting it's intended for. When applying variables to a preflight check setting, only the variables which match that type of entry will be displayed.
For example, if a variable for a trim page size is to be created, then it must have a "Length" variable type. If a variable is needed to select or deselect a check box (such as to turn on a correction), then a Boolean variable type needs to be defined.
You can provide a brief description about the Smart Preflight Variable Set you are creating in the Description list box.
Variable Type: